Buuky offers automatic synchronization of user data via SCIM with identity providers (e.g., Microsoft Entra ID, formerly Active Directory). New users are automatically created, modified, or deleted as soon as this occurs in the identity provider.
Note: Synchronization is one-way! Changes in Buuky are not transferred to the Identity Provider.
Navigate in the Buuky Configuration to Integrations > User Synchronization (SCIM).
Important! The client key must remain secret and may only be stored in your identity provider. Do not share this key with other people or third parties.
For Microsoft Entra ID, you can follow the official Microsoft instructions: Microsoft Entra ID SCIM EN
You will find the required attribute mappings if you follow the official instructions here
Alternatively, we describe the necessary steps here:
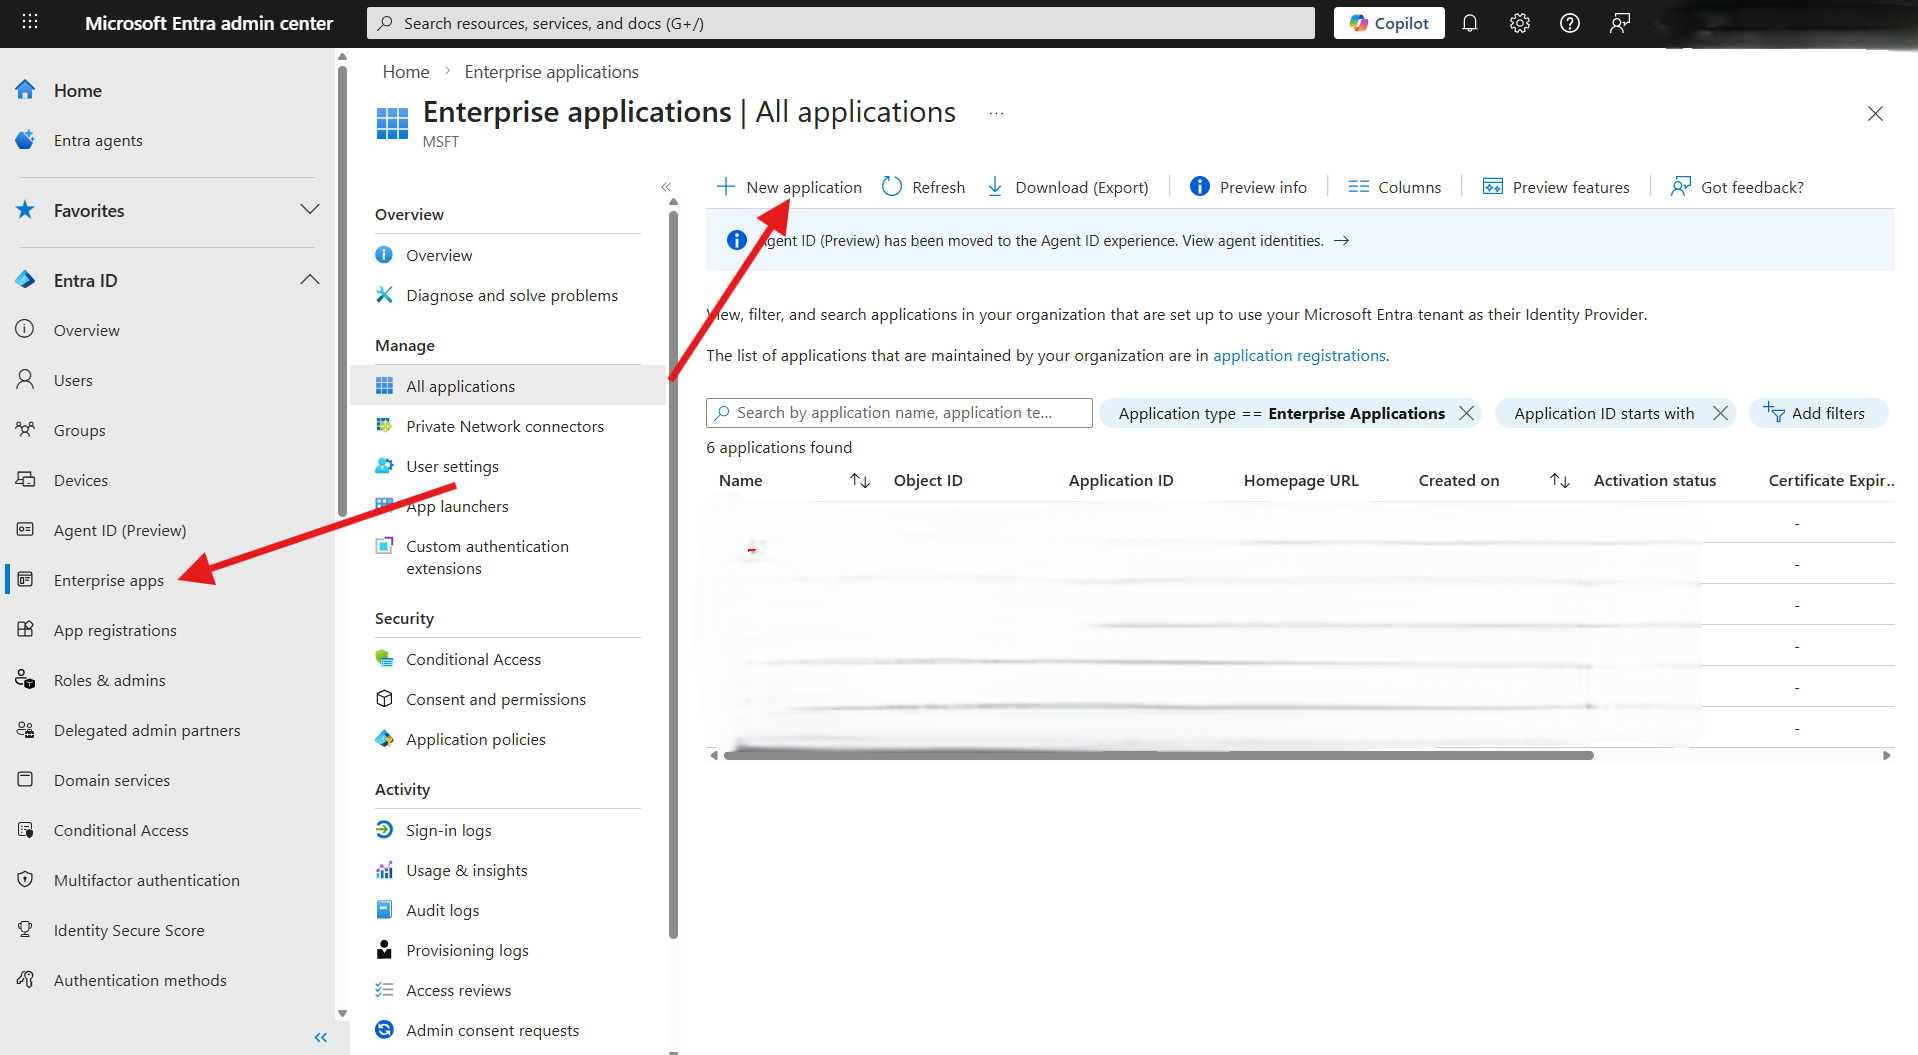
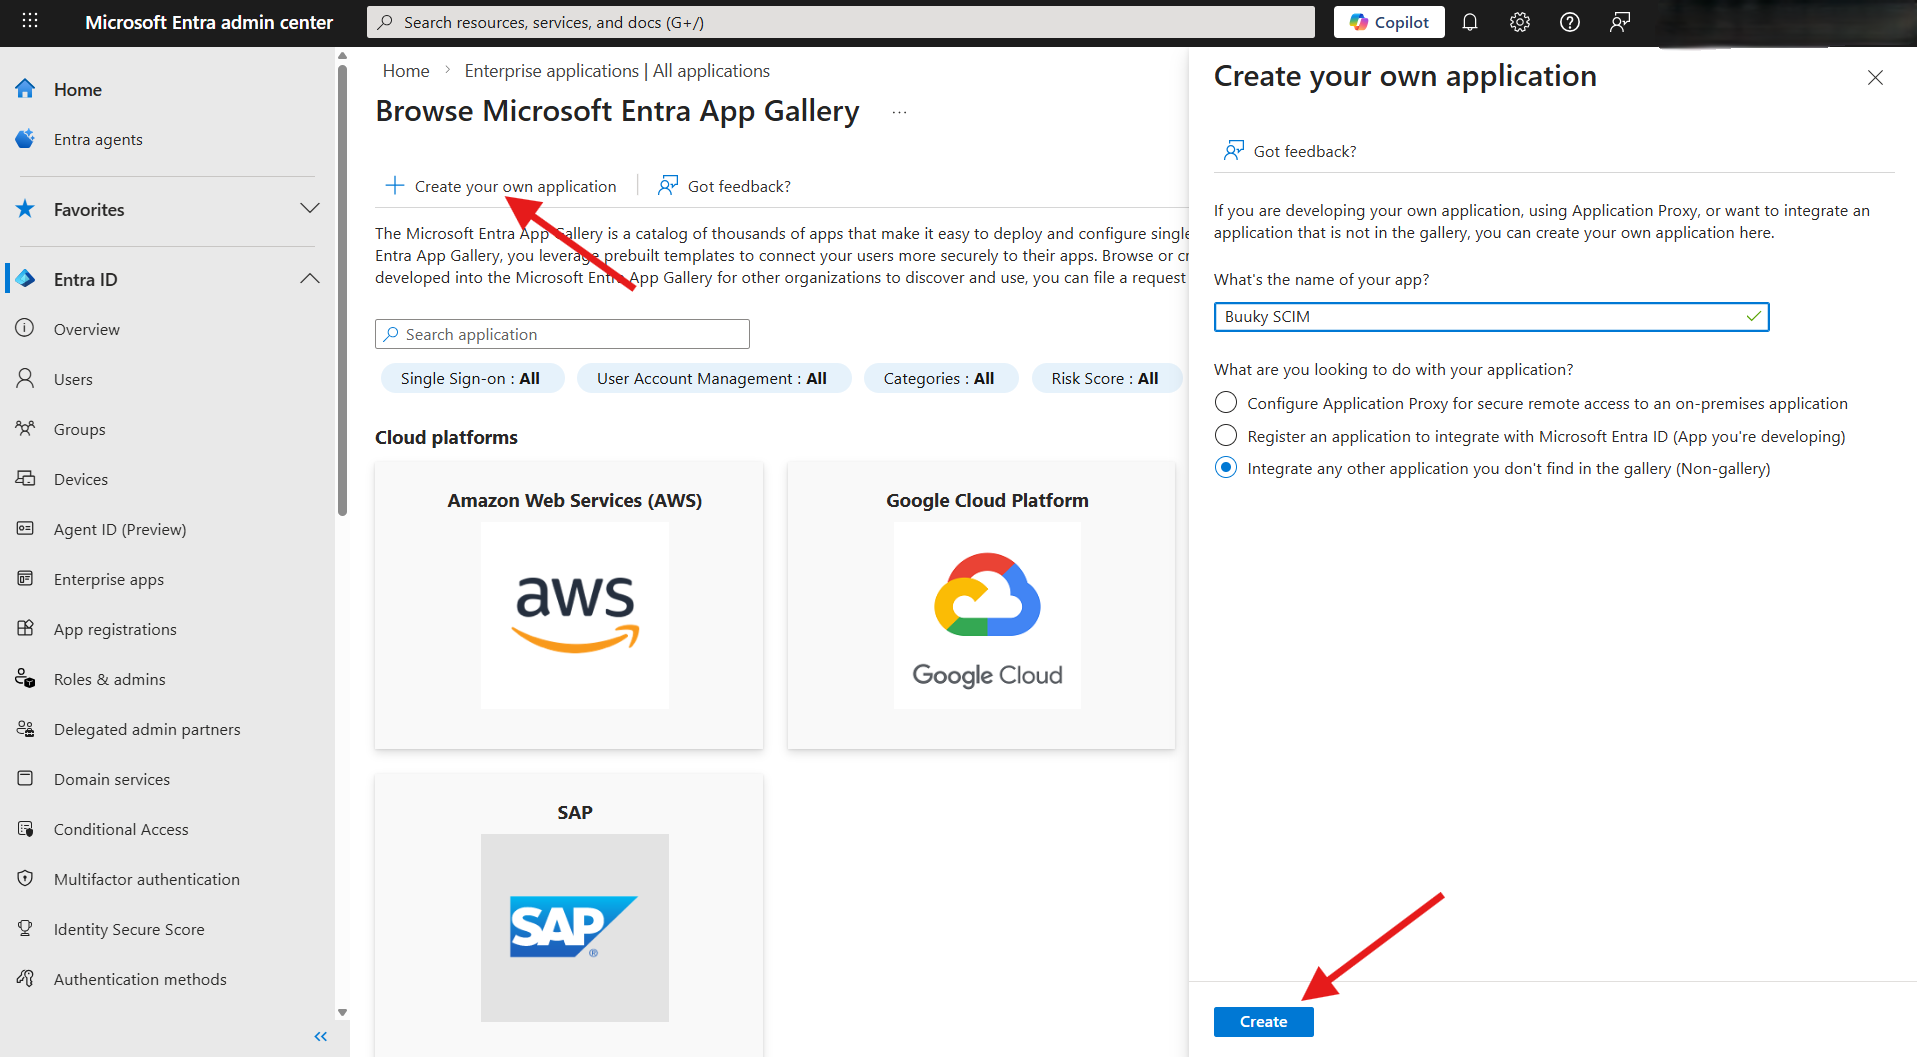
Select in your Microsoft Entra Admin Center Enterprise apps the option New application and then in the top navigation Create your own application.
Give the application a name (e.g., “Buuky SCIM”), select Integrate any other application not found in the catalog, and click Create.
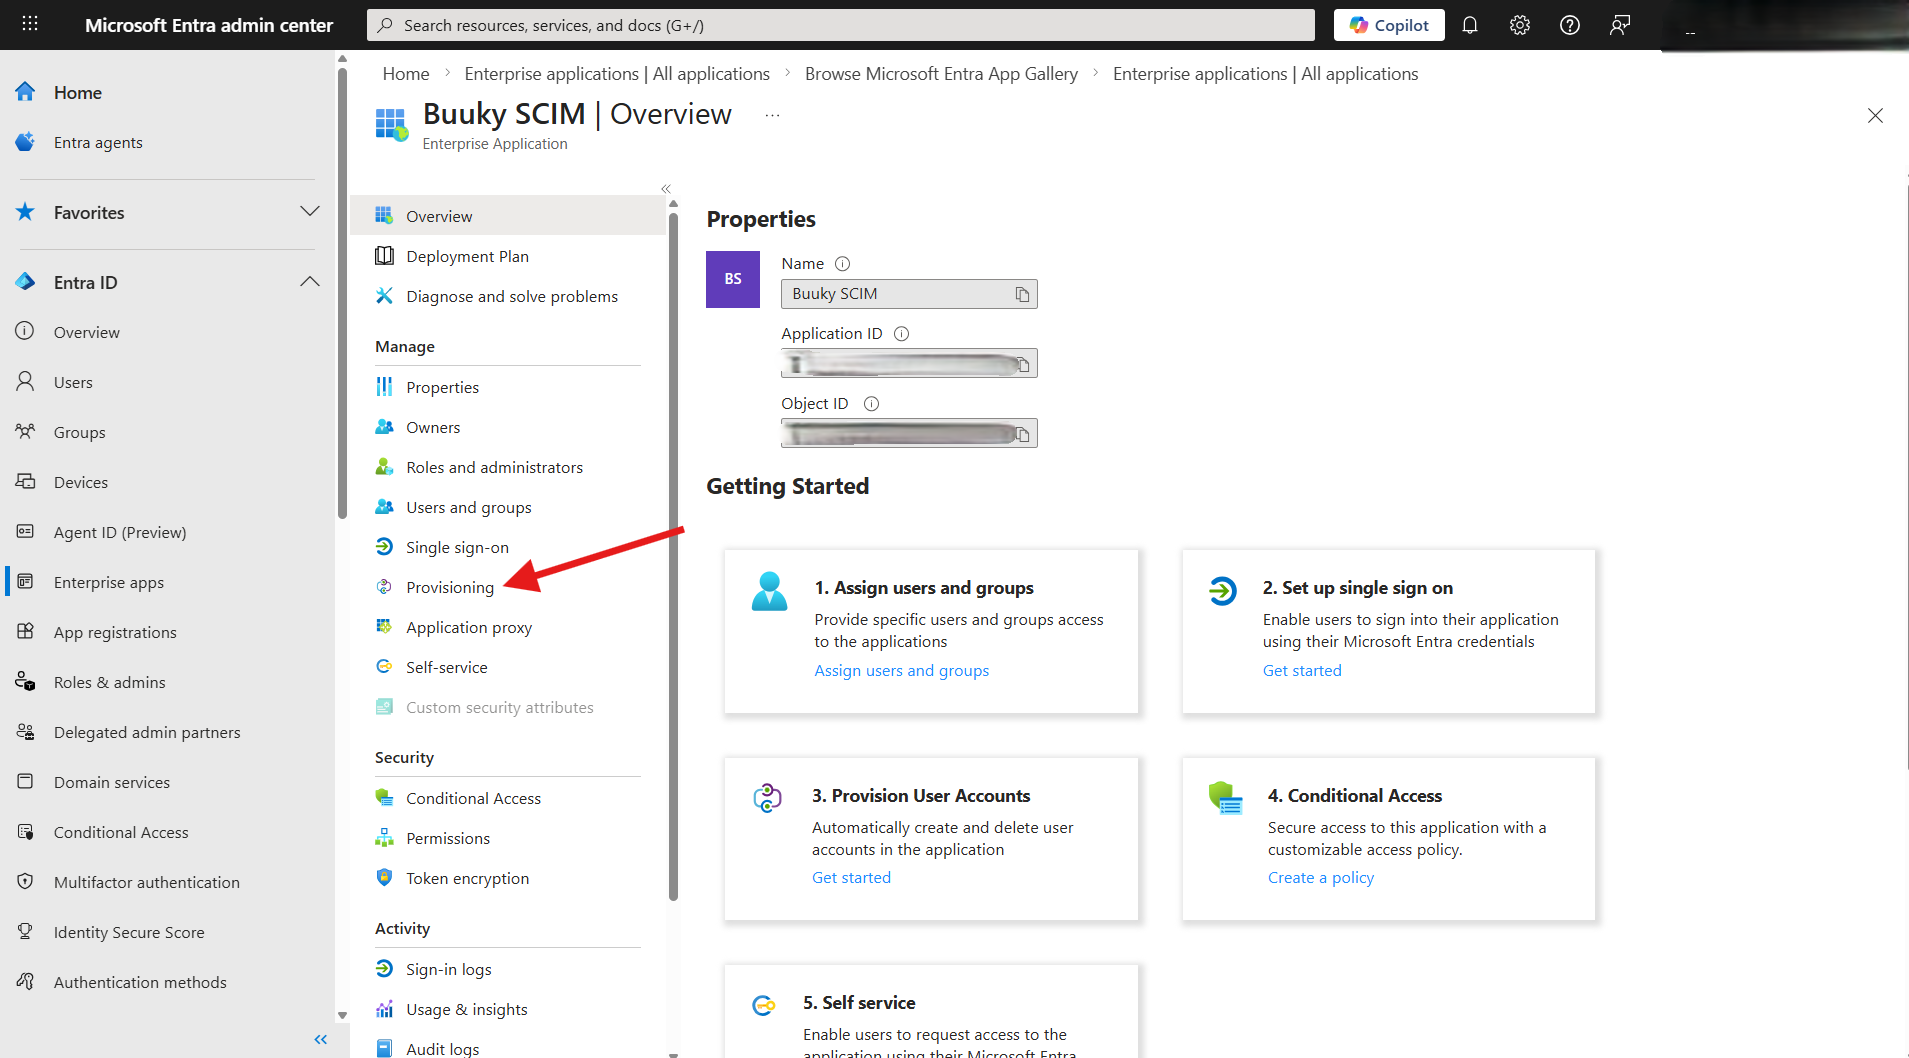
Select Provisioning in the left navigation bar.
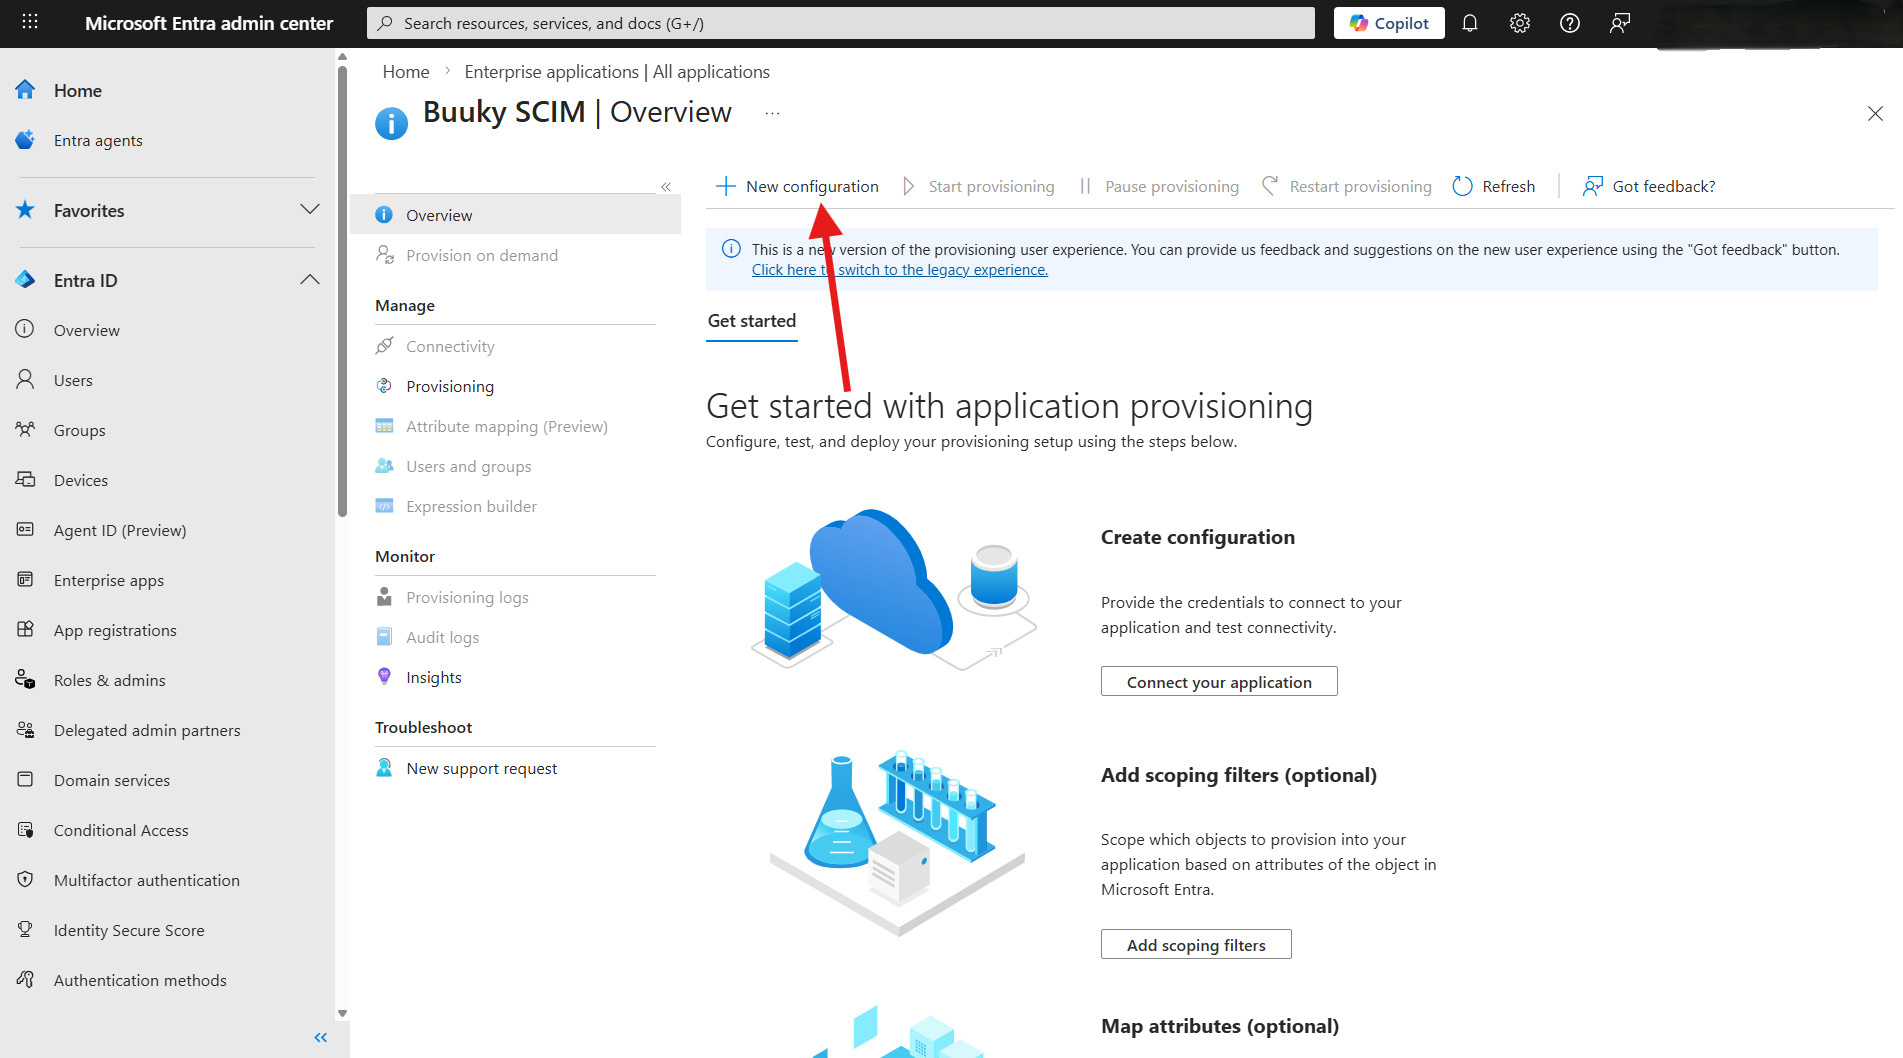
Select New Configuration in the top navigation bar.
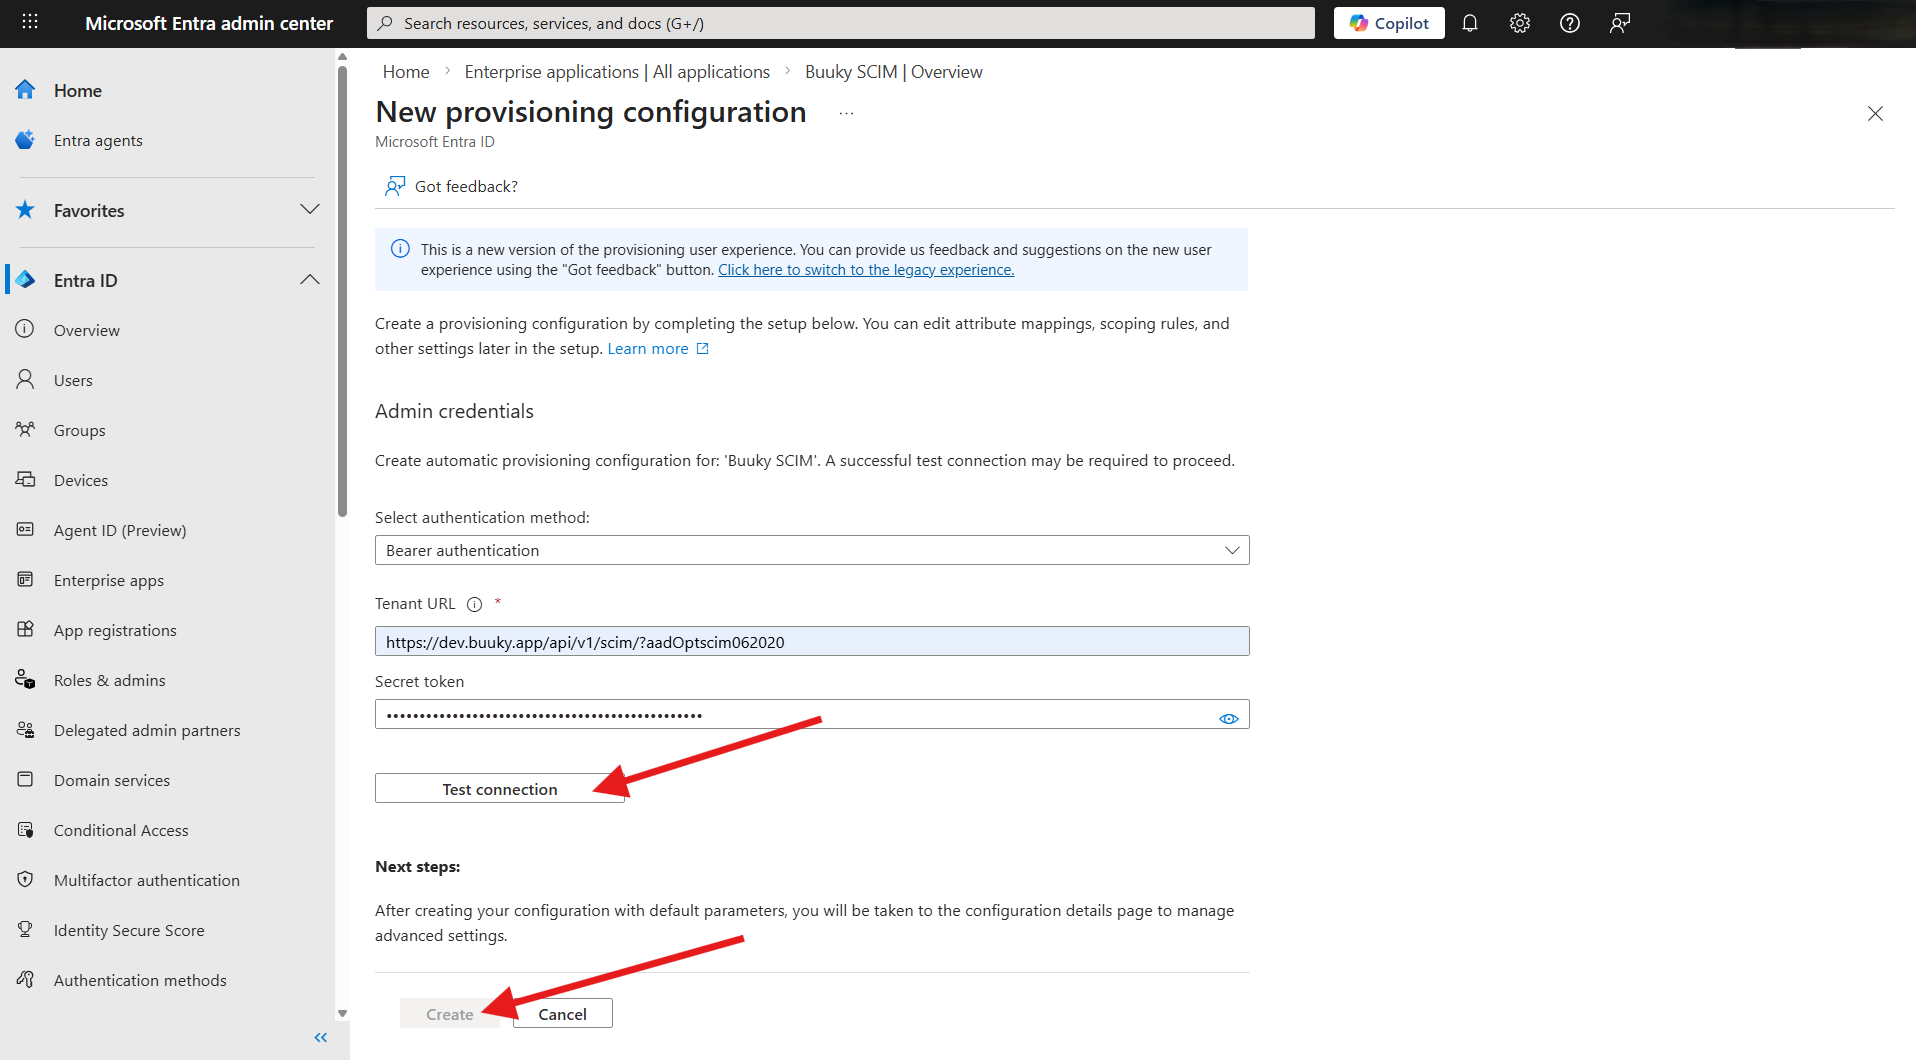
Enter the Authentication method Bearer authentication and enter the values from the Buuky SCIM configuration. Click on Test connection and then on Create.
Select Attribute Mapping (Preview) in the second navigation pane on the left.
Deactivate Groups
Select Provision Microsoft Entra ID Groups, change Enabled to No and click Save (at the top).

Change User Mapping
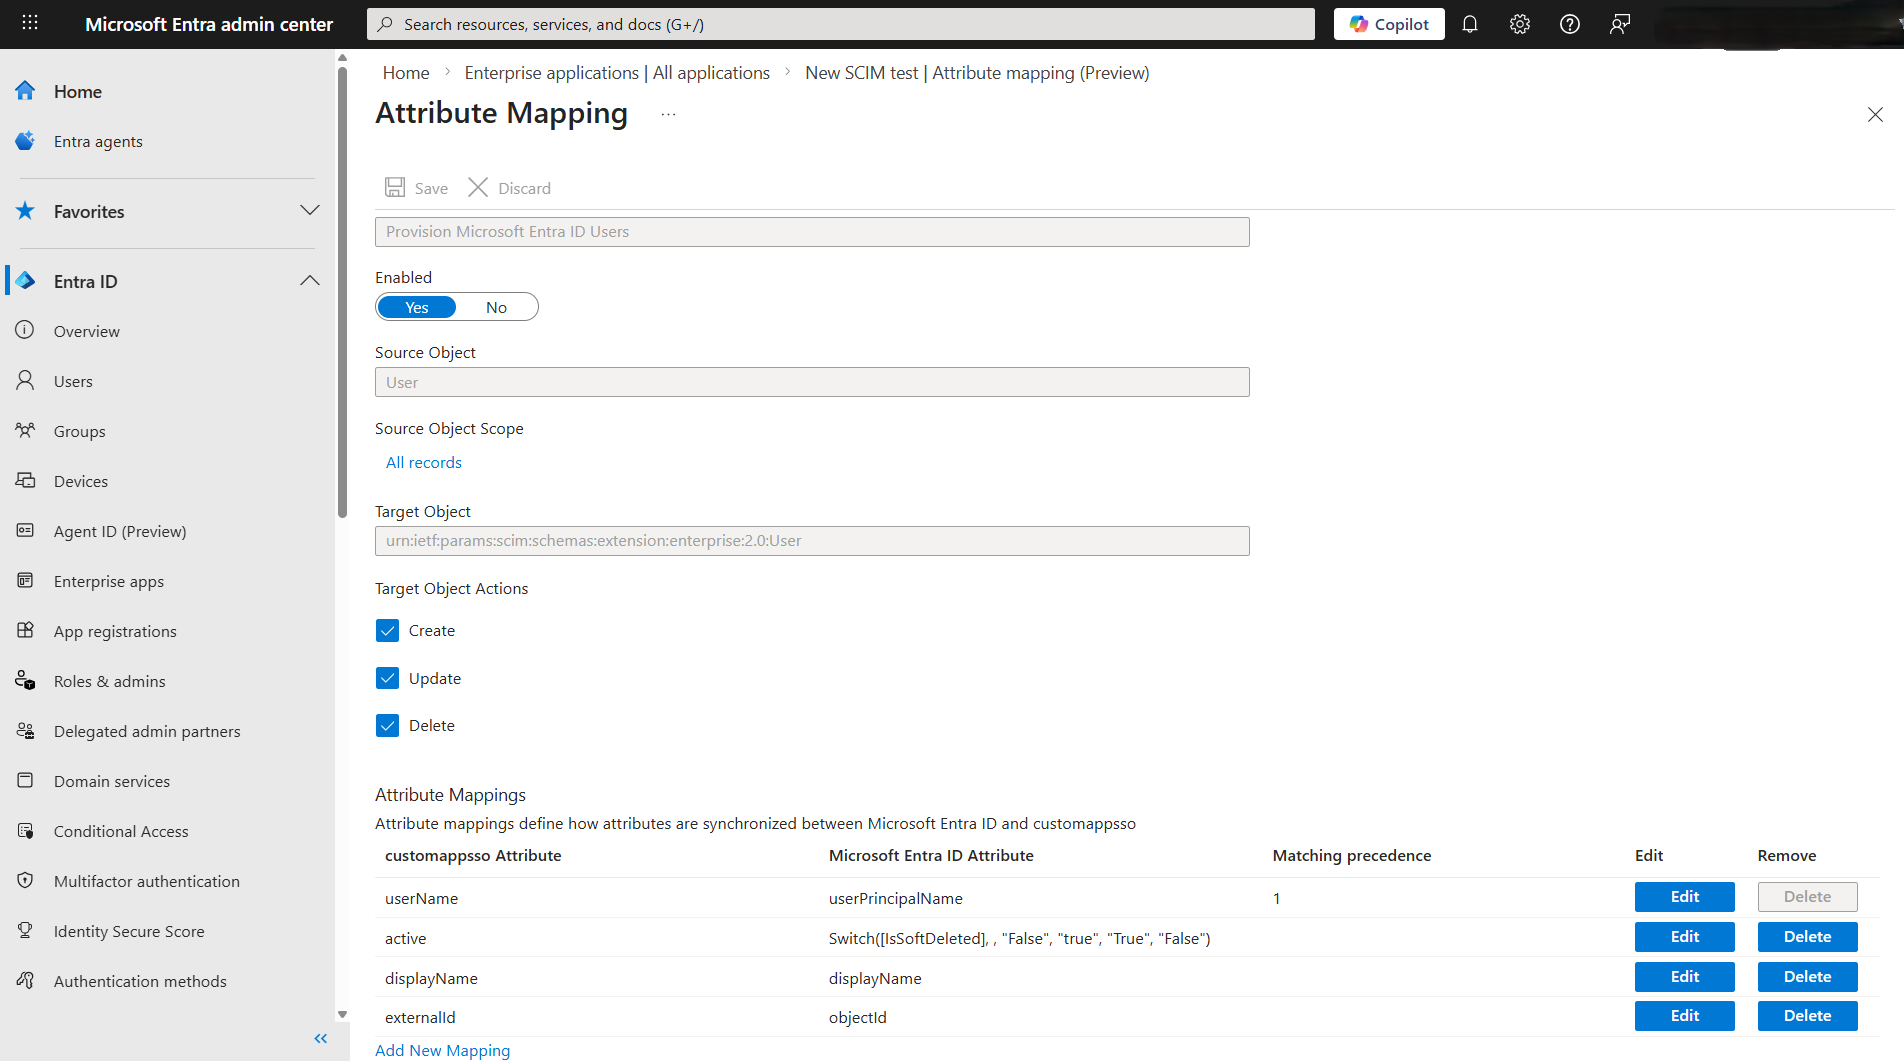
Now select Provision Microsoft Entra ID Users. Delete all existing attribute mappings and add the following new mappings, or edit existing mappings and delete attributes that are not needed.
Target Object Actions: Create, Update, Delete
| customappsso Attribute | Microsoft Entra ID Attribute | Matching precedence |
|---|---|---|
| userName | userPrincipalName | 1 |
| active | Switch([IsSoftDeleted], , "False", "true", "True", "false") | |
| displayName | displayName | |
| externalId | objectId |
Attention: The attribute active is of mapping type Expression. The other attributes are of the type Direct.
Then click Save (at the top).
In the second navigation pane on the left select Users and Groups and choose whether all users/individual users or only certain groups should be synchronized.
Note: Ensure that your Buuky license is sufficient for the number of Users to be synchronized.
Then click on Save and start the synchronization by clicking on Start provisioning at the top.

Your secret token and tenant URL can be viewed at any time behind the Show configuration details button.
Under Synchronization you can see the last transfer time, as well as details of the requests that the Identity Provider has sent to Buuky so far. There you can also see whether the changes were successful and when they were executed.
To delete your Connection click on End SCIM connection and delete and confirm that you want to disconnect. Your users will remain and must be deleted separately. Only the automatic synchronization will be removed.
