Buuky offers an integration with Personio as employee management system. The integration allows both employees and absences to be synchronized. This means that employees do not have to be maintained twice and bookings are automatically released in case of an absence (e.g., sickness).
Employee synchronization ensures that...
The absences from Personio are used to cancel bookings in the absence period. This includes absences such as illness, vacation, and parental leave, but also self-configured absences.
Exception: Bookings with a blocker are not automatically deleted as they are not necessarily affected by the absence. For example, if places are blocked for new employees.
Buuky automatically queries the Personio interface every 10 minutes. If required, synchronization can also be triggered manually via Buuky administration.
Personio API access data is required so that Buuky can query the necessary data from Personio. These can be created in the Personio settings and then stored in the Buuky administration. The following steps are necessary for this.
This step must be carried out in Personio.
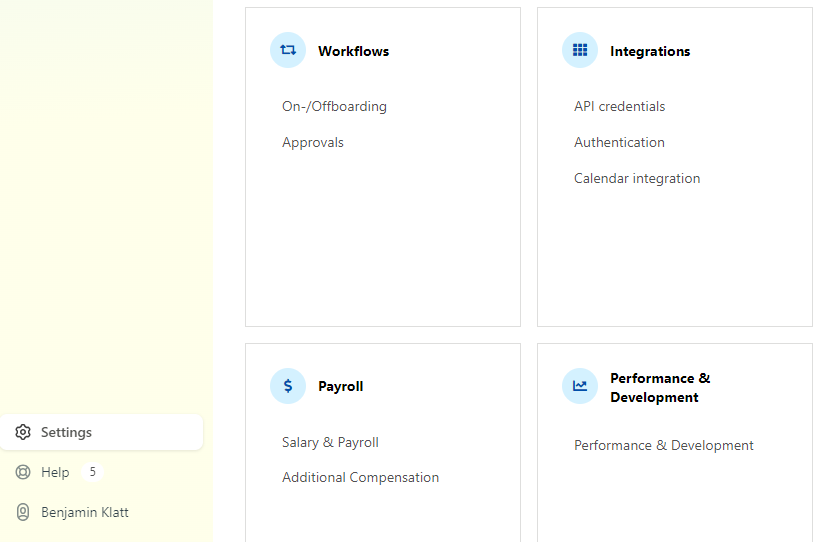
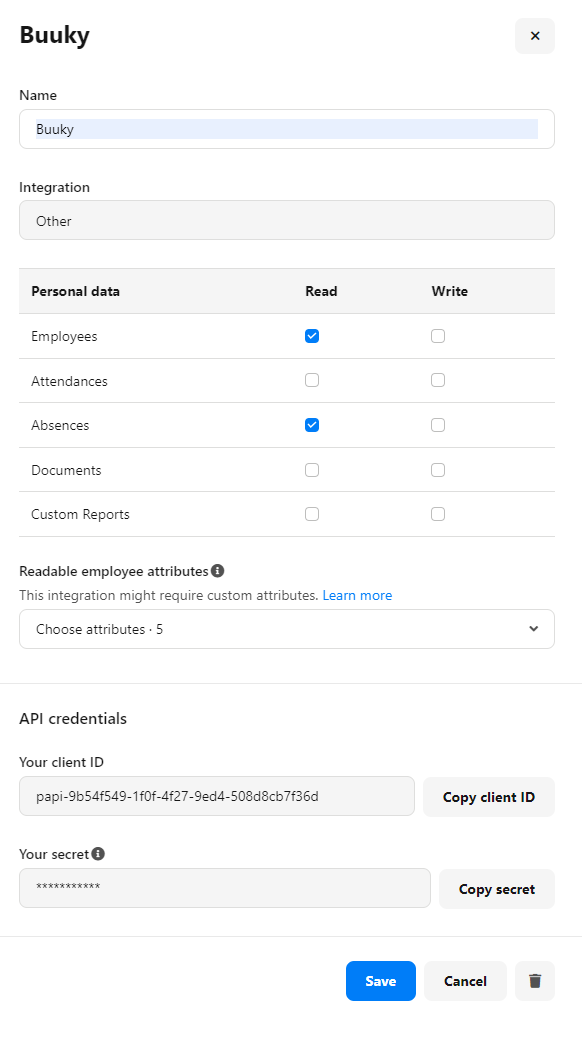
To create the access data, go to the settings in Personio (1). Under the menu item API credentials (2), click on the button generate new credential (3). We recommend using Buuky as the name (4) and for the Personal data (5), you must check Read for both employees and absences. Write rights are not required.
The following values must be selected in the Readable employee attributes (6) section that then appears:
Then confirm everything with Generate new credential. The values now displayed for Client-ID (7) and Secret (8) must be copied and stored in Buuky in the next step.


This step must be carried out in Buuky.
The Personio integration can be configured in Buuky under the Integration item and the Personio sub-item. On the configuration page, the Personio Client-ID and the Personio Secret must be entered in the corresponding fields and saved. If the API access data is saved, an initial test connection is carried out to validate the connection data.
From now on, synchronization is performed automatically and does not need to be triggered manually.
In addition to the setup, the Buuky configuration offers further options for Personio integration.
The first synchronization run can be carried out directly from Personio by clicking Synchronize now. Depending on the number of employees and absences already entered, the first call may take some time.
The test mode allows for an initial test before the Personio integration is actively used. If the test mode is active, no changes are saved in Buuky and no email invitations are sent. In addition, no time-controlled synchronization takes place.
The configured integration can be deleted here. The Buuky users are retained and must be deleted separately.
If you have not only configured the Personio integration, but also the Microsoft SSO, all members of your Microsoft organization can automatically log in to Buuky via Microsoft SSO. Even users who are missing in Personio but belong to the Microsoft organization can log in. In contrast, however, if a user is present in Personio but not in Microsoft, they cannot log in. However, they can be manually invited to Buuky by email in the “Active Members” tab and can then log in to Buuky with their email and password.
The invitation emails, which are normally sent to Personio users, will no longer be sent once the Microsoft SSO has been configured because the users do not need an individual password anymore. To avoid unnecessary emails, we therefore recommend configuring the Microsoft SSO first and then the Personio integration. However, the reverse order also works.
As long as the users are stored with the same email address in both the Microsoft organization and in Personio, the absences from Personio are synchronized as usual. The user data such as the user name are, however, synchronized with Microsoft instead of with Personio.