Buuky comes with three build-in types of user management:
Depending on the type of user management used, different options are available within the Buuky configuration.
Email & Password
This option allows administrators to manage users within the Buuky configuration. Users can be invited with their email address.
Microsoft365
If the Buuky Office365 integration is used, the users are managed there.
In Buuky, user management is still provided to grant or revoke different roles for registered users.
Buuky Confluence App
The Buuky Confluence App is fully integrated with the Confluence user management. Every user who is able to log in
to Confluence can open and use the Buuky app.
The configuration of admin users is done with the Confluence App configuration. Accordingly, user management is not available in the Buuky configuration area.
The Buuky user management is located in the left sidebar of the configuration area, as shown in this screenshot. In the Confluence app, this section does not exist as described above. With Microsoft365 and no Email/Password, only the active members part will be available.
The active members view shows all users that have logged in to Buuky. For example, in the case of a Microsoft365 integration, it shows only those users who have logged in to Buuky and not all users registered in Microsoft365.
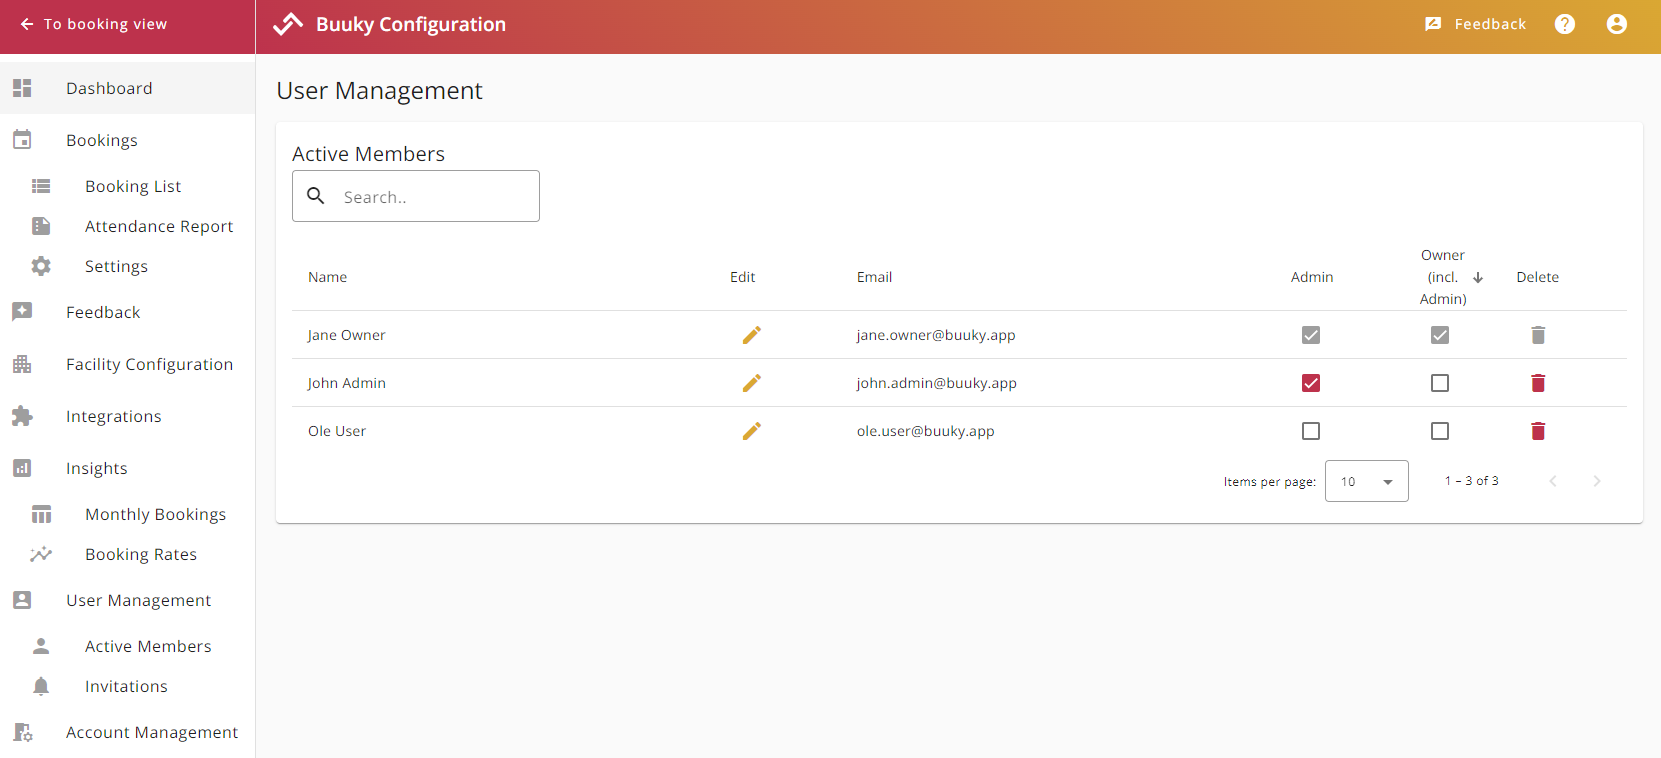
The list can be sorted by clicking the table headers. The search field allows filtering the list
by name or email.
The table footer allows for paginating through the list and choosing how many members to present per page.
Available Actions
Furthermore, the active member list allows
With the Email/Password user management option, Buuky provides a user invitation section.
Users can be invited with a name, email adress, and the option to grant admin permissions.
Submitting an invite sends an email to the user with a welcome text and link to accept the invite.
The email is send in your current browser language.
By clicking the link, the user will enter a page to define a password with at least 6 characters.
By submitting the password, an active member will be created in your Buuky organization.
The user will be forwarded to the login screen and can use Buuky immediately.
Note: An invitation is valid for 7 days. After this period, the invite token will expire for security reasons, and you will have to delete the old invite and send a new one.
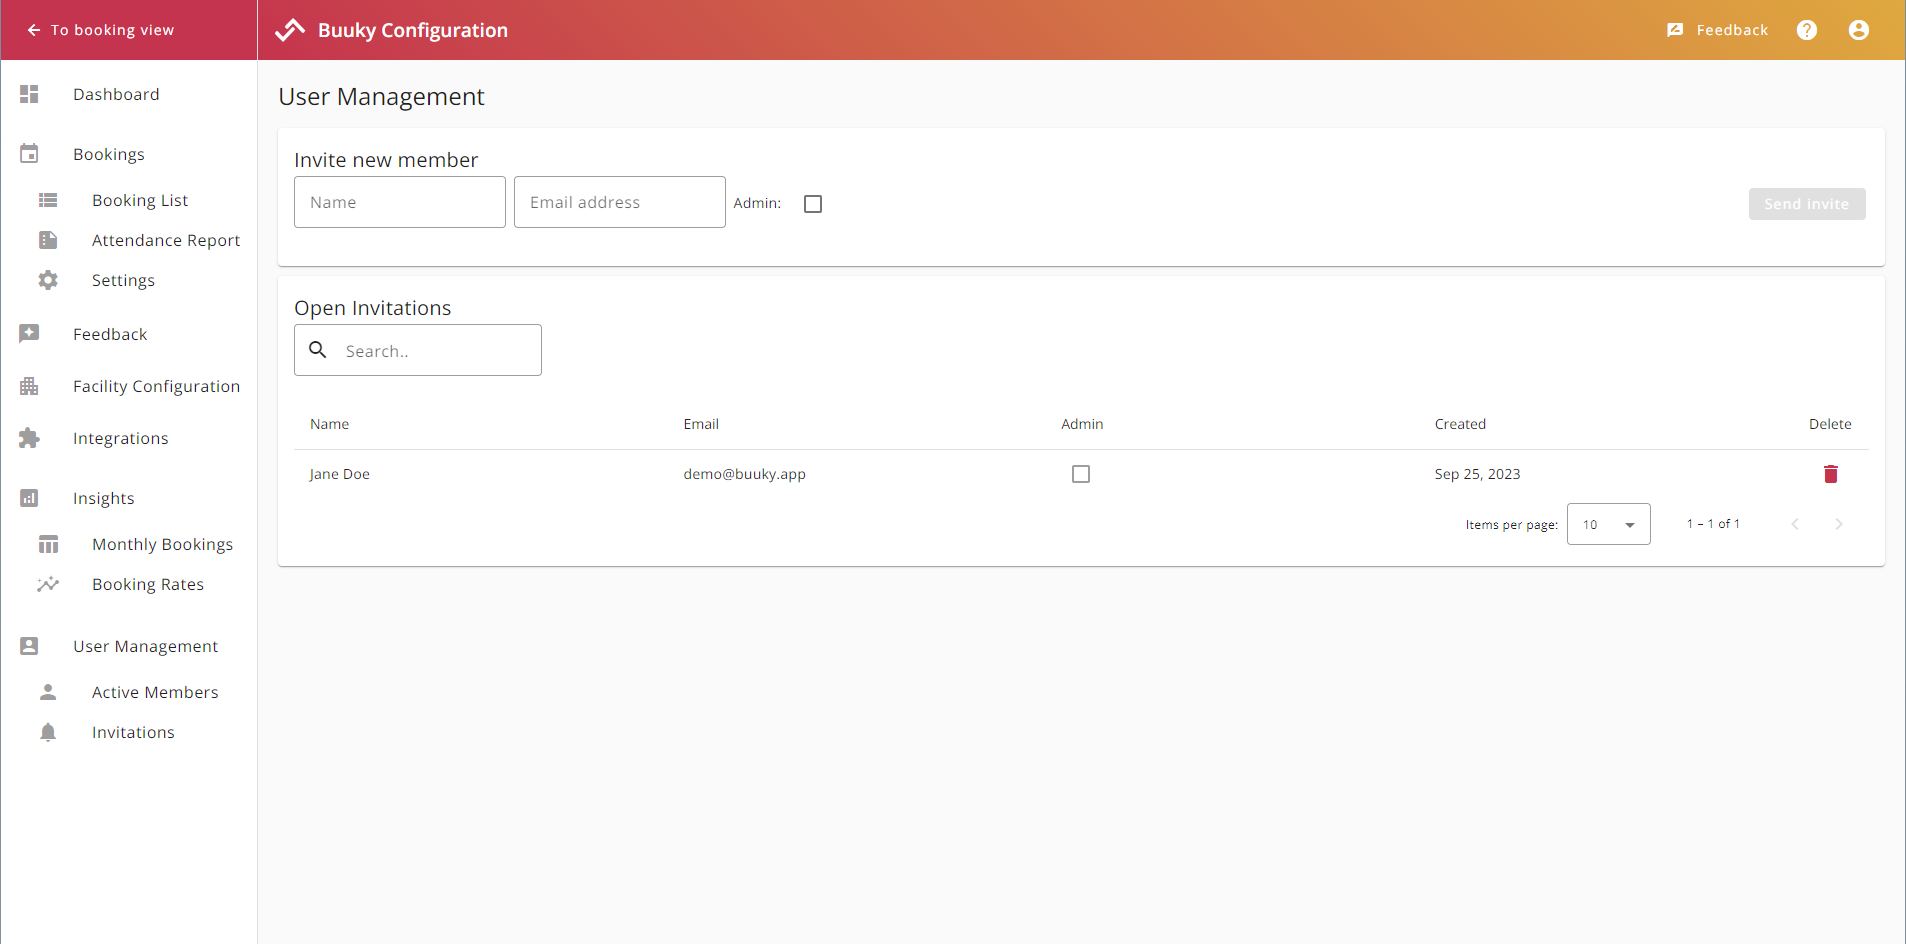
The invitation view provides you with a list of all open invitations. As soon as an invite is accepted and the user becomes an active member, the invite will be removed from the list.
You can delete (reject) and invite by clicking the bin icon.
The teams view allows the admin to create teams and add members to it. The following picture shows the corresponding screen.
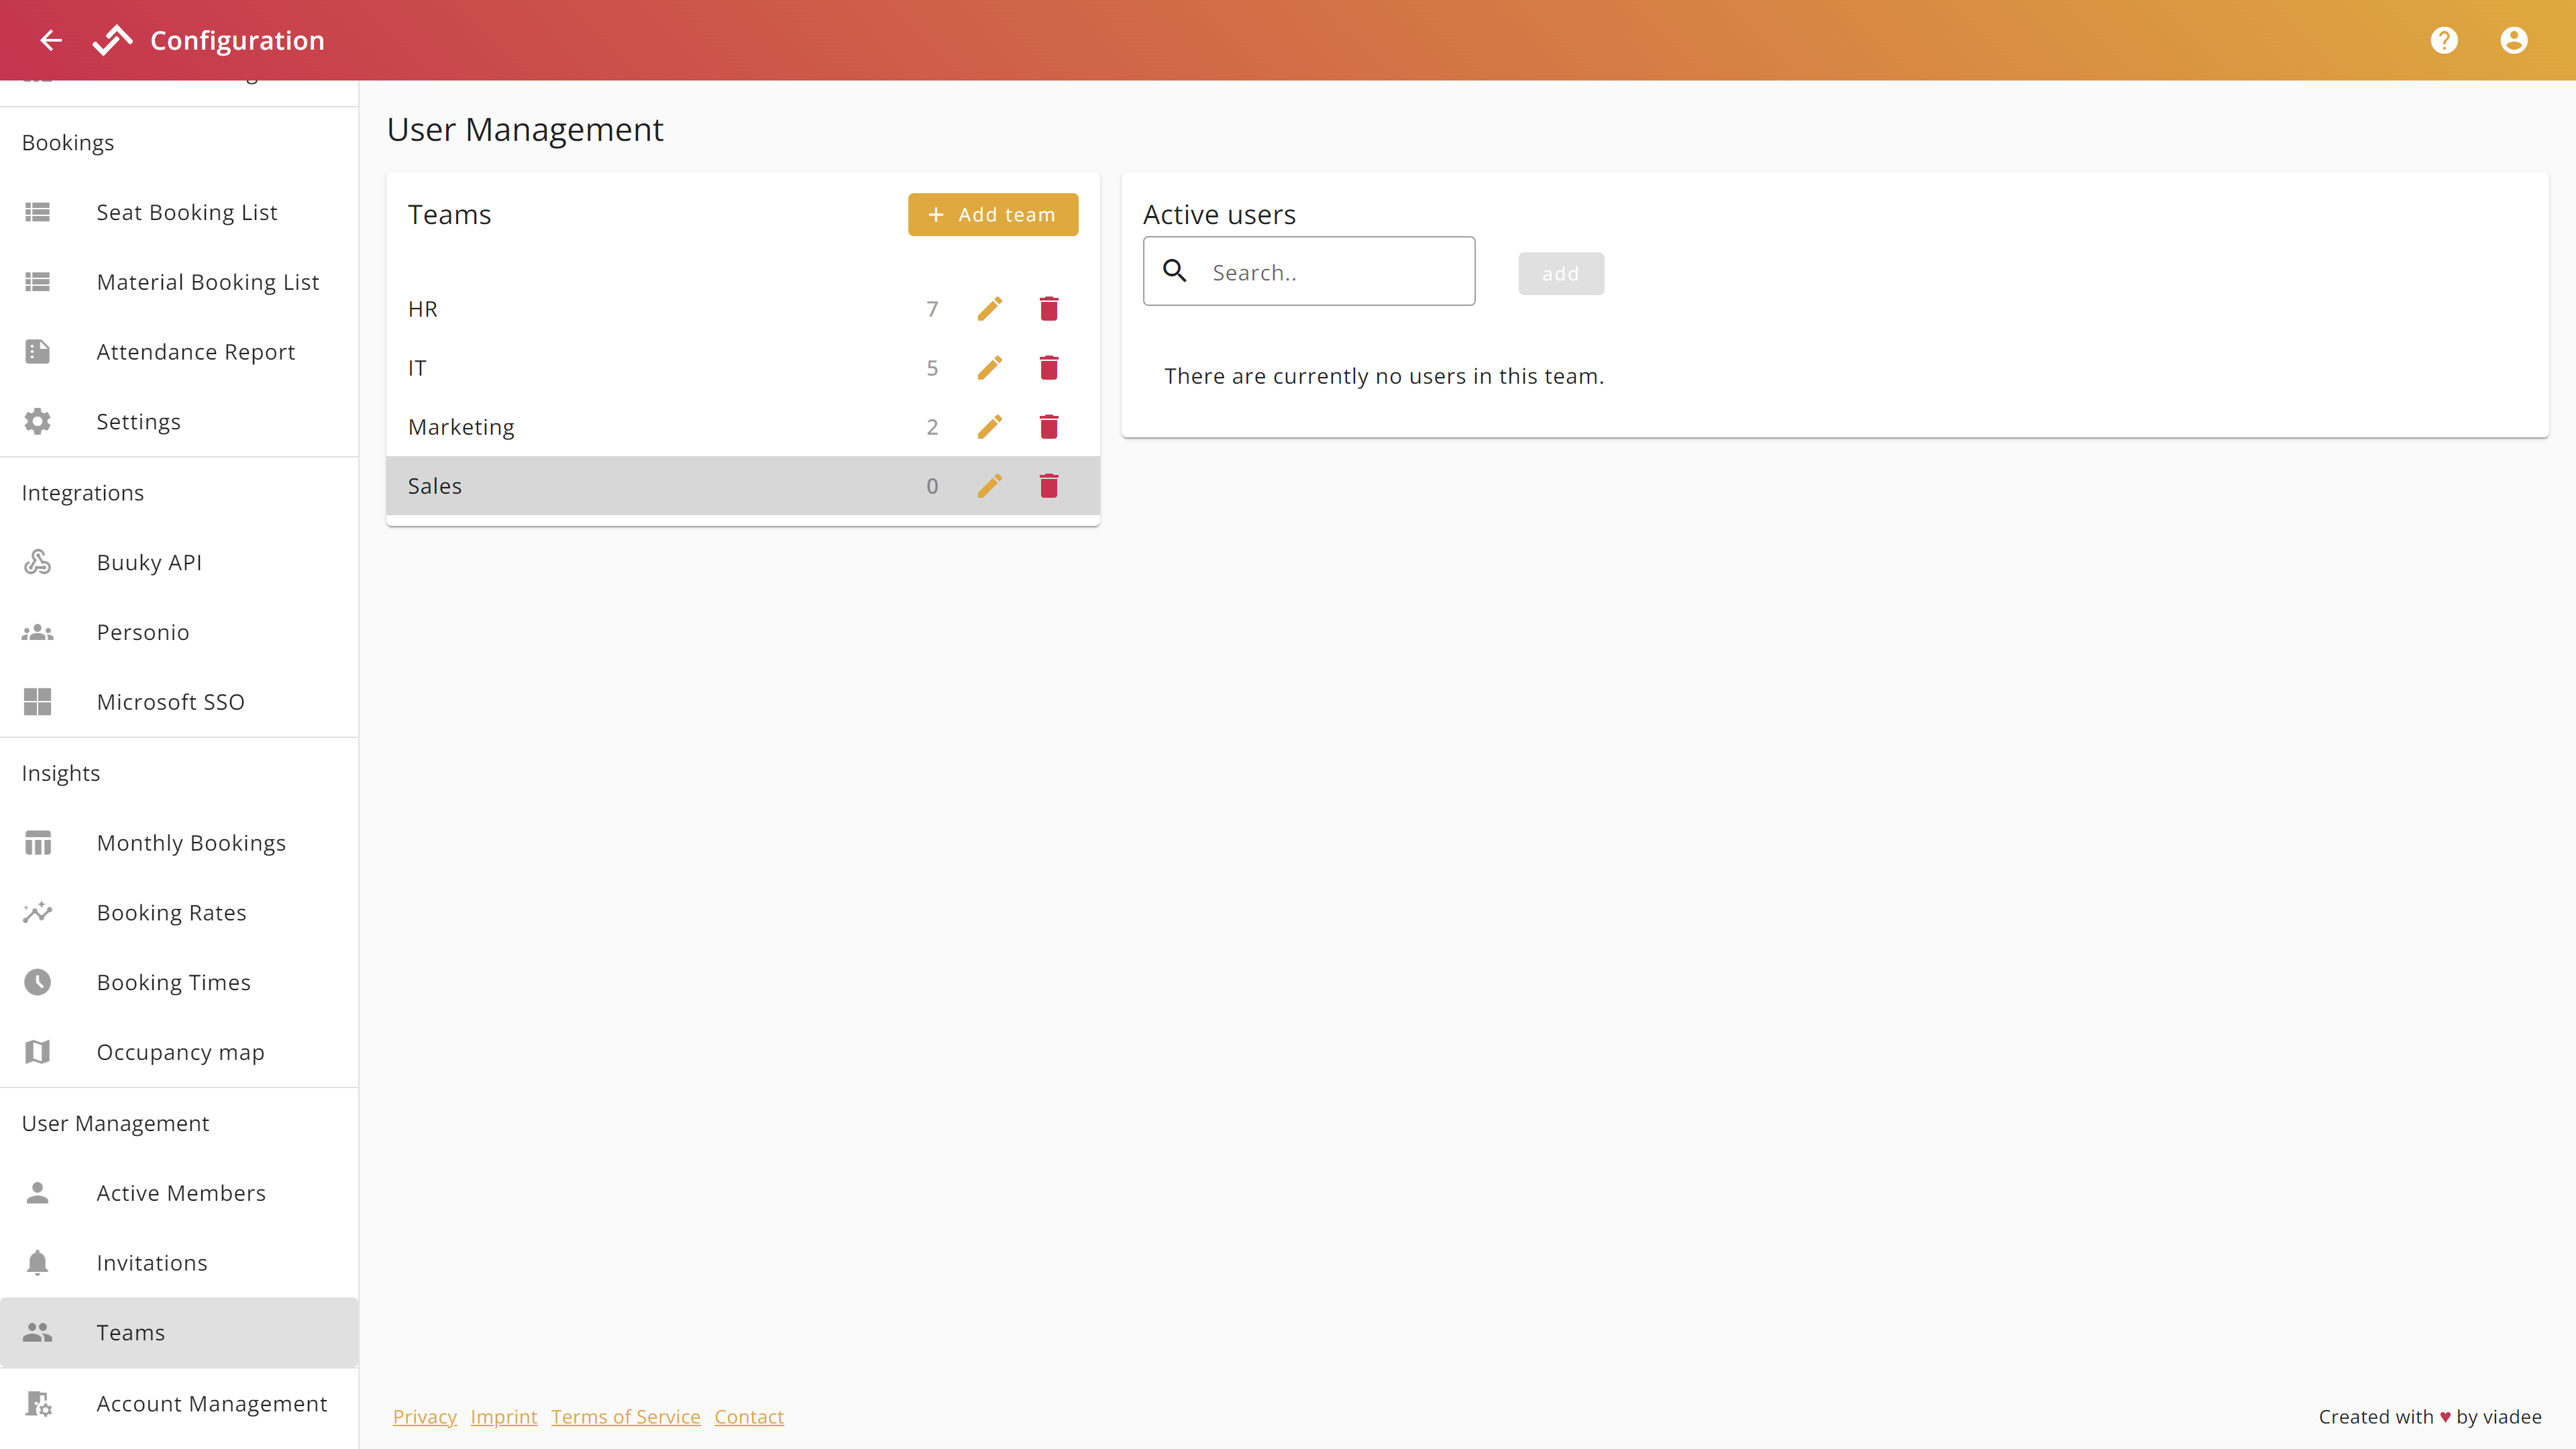
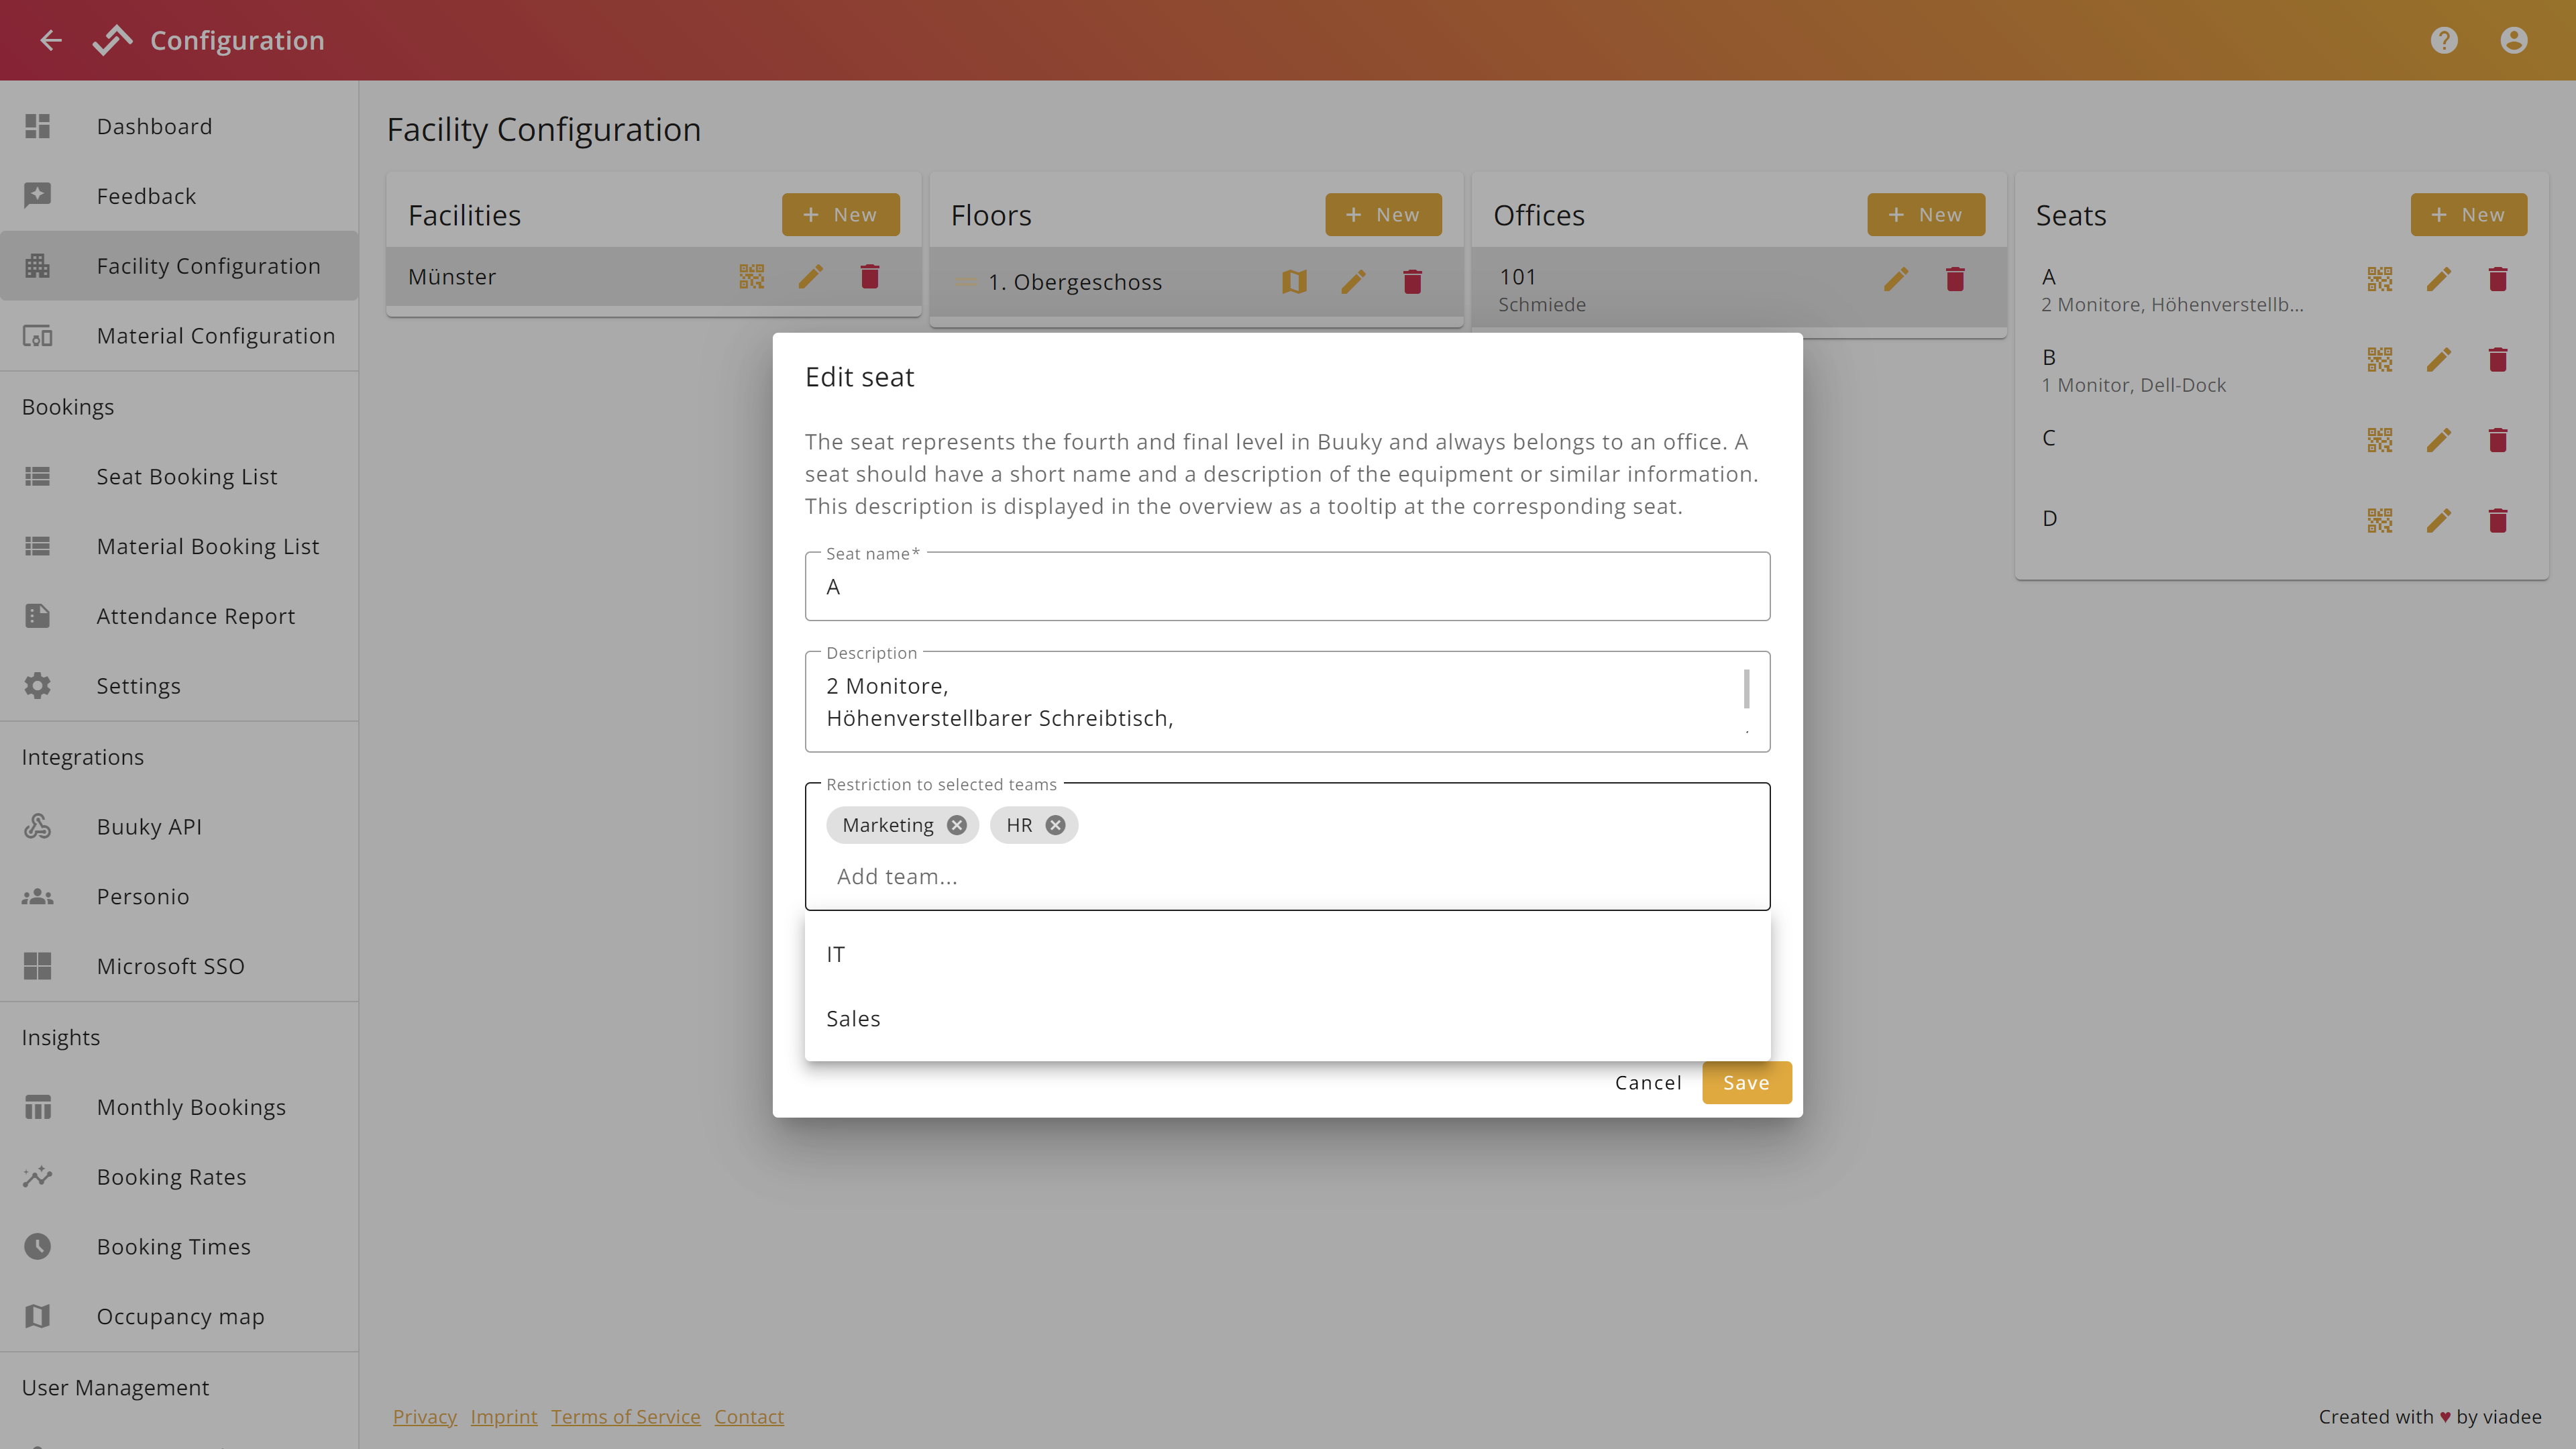
When editing or creating a seat, the dialog allows to assign those teams to the seat, that should be allowed to book the seat. If the seat is only allowed to be booked by the marketing team, for example, the marketing team could be assigned to the seat. People not belonging to that team then cannot book the seat anymore. If no team is selected in the dialog, every user can book the seat.
